I am still having problems with my blog, but please hang in there with me. I have an expert working on it and things should be back to normal soon. Thanks for being so patient with me, this is so stressful.
Choosing fabric for the guest bedroom is fun and difficult all at the same time. I love our new house, however like any home it has it’s challenges. The previous owners had new carpet installed before they put the house on the market. It is really nice carpet, just not my color choice. Nothing really bad, just a little dark for me. It is a tweed with specks of black/brown/cream in it, and somehow reads a little on the chocolate side that tends to have a bit of red in the right light. I tried a few different fabric samples to see what might work and finally decided on light and bright.
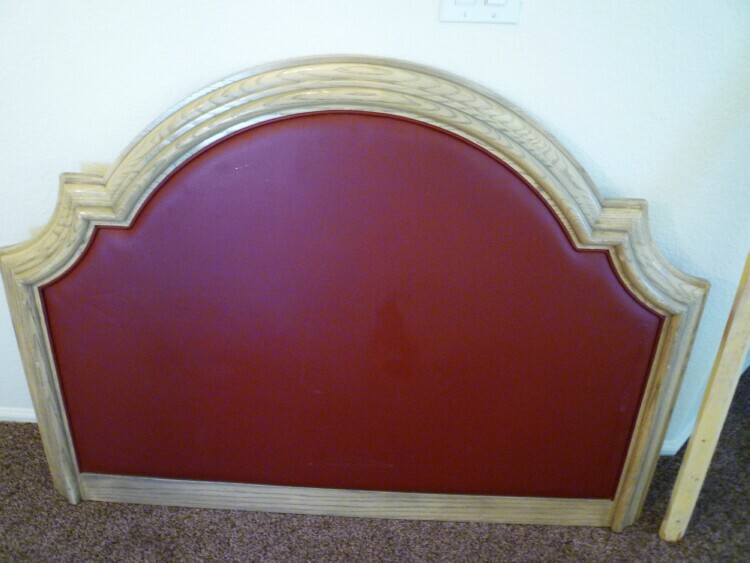
This is what it looked like when I found it at Hotel Liquidators. I added gel stain to give the frame some dimension. Now to reupholster it.
All of these would work with the carpet and are colors that I really like. I decided that since this is such a small room, I would go light and monochromatic.
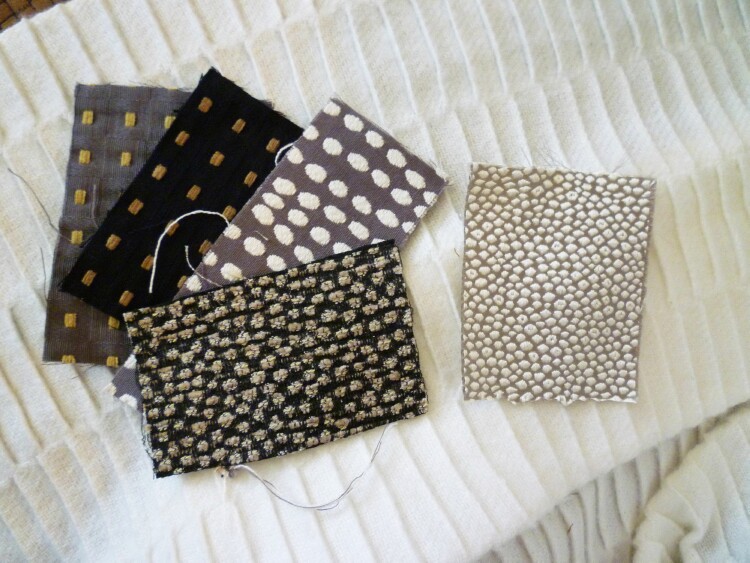
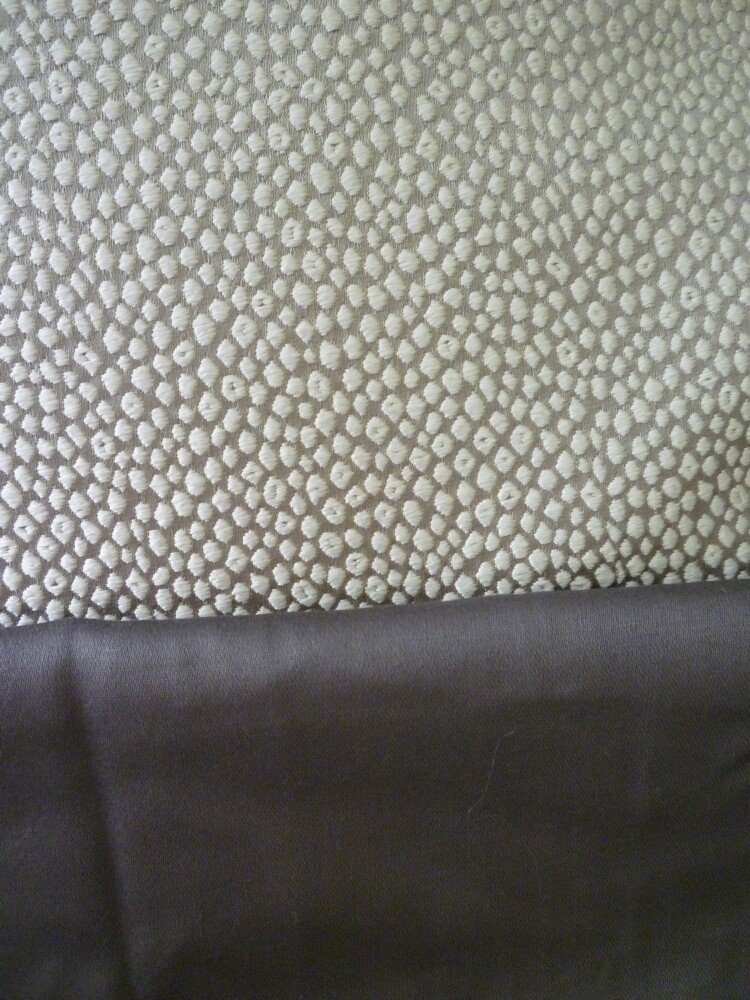
I chose this taupe/gray dotted fabric. It goes well with brown and with gray and that is what I wanted. I can change things up and not be married to one color scheme. I already had some dark gray shams, so that works too.
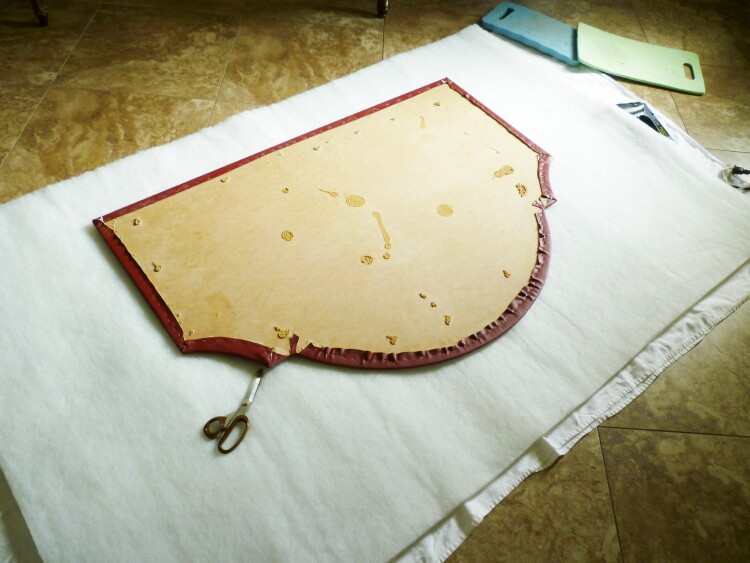
I was trying to find a place that wouldn’t impede traffic to work on to cover the headboard insert. The middle of the living/dining room seemed my best bet. haha Doesn’t everone do an upholstery makeover in their living room by the front door?

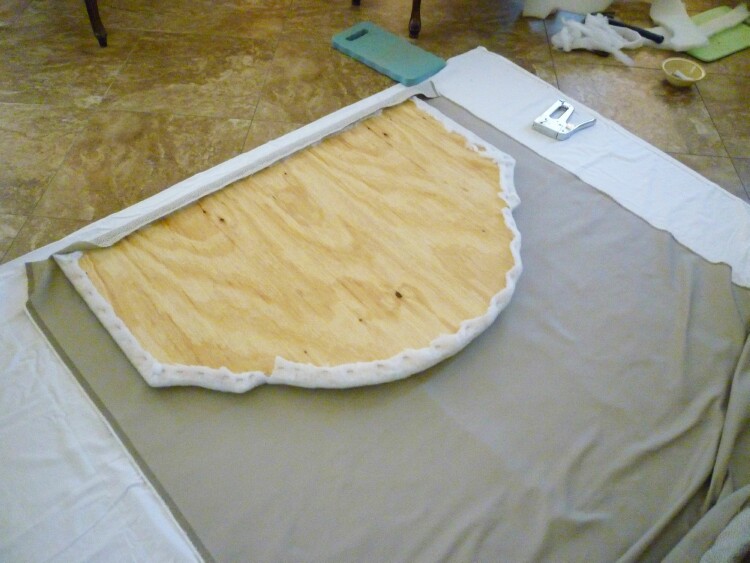
I had everything all layed out. The red leather cover that was on the insert had a small piece of foam attached to it, I didn’t take that cover off, in fact I wanted more padding, so I layed it down on a thick piece of batting and cut around it so I could start stapling it on. However that particle board they used was so hard I couldn’t get a staple to go into it. Not sure what kind of staples they used, but I tried a hand stapler and my electric one and nothing would penetrate that board. I even tried a nail and I couldn’t get it to go in either without bending. So back to the drawing board.
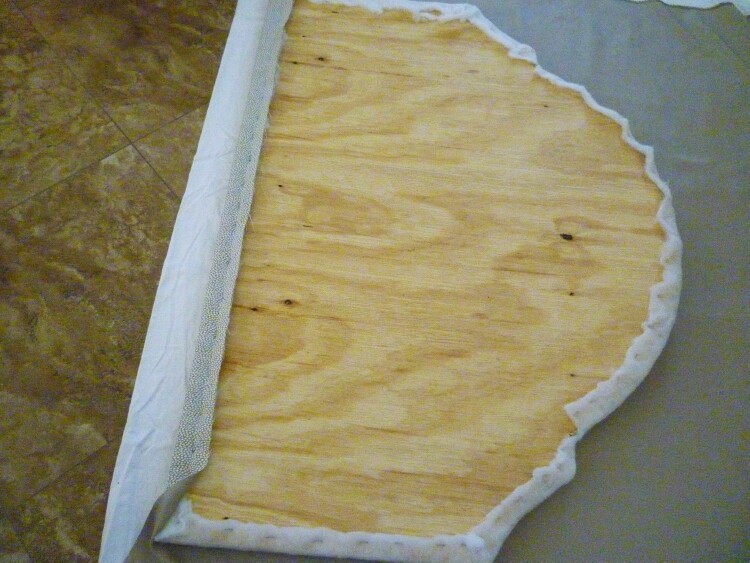
A trip to Lowes and I had a piece of plywood. We traced the outline and cut out the design, then I covered it in two layers of batting. Now to do the fabric.
You guys have all seen a million tutorials on how to pull the fabric tight working from top to bottom and side to side. I didn’t take a bunch of pictures, it’s the same process you have seen, so I just got busy and started stapeling. You can see how the batting is pulled around and stapled, the same thing applies to the fabric. If you really need to see a step by step, you can check out this simple tutorial here.
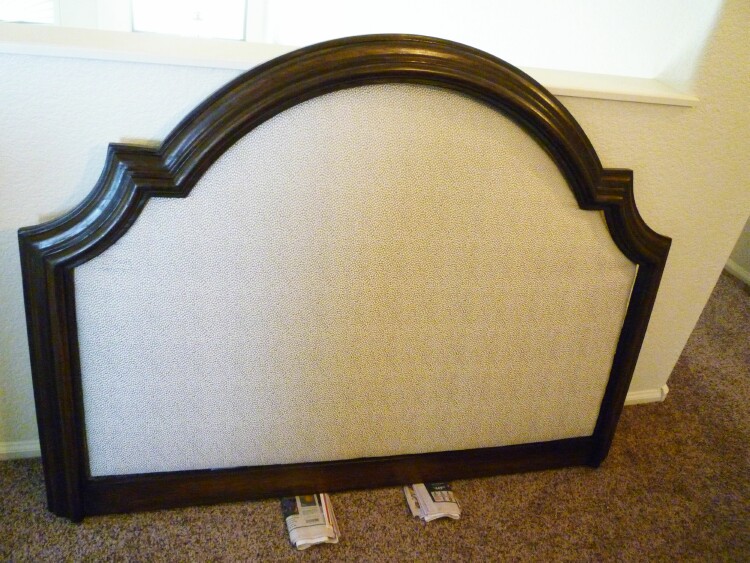
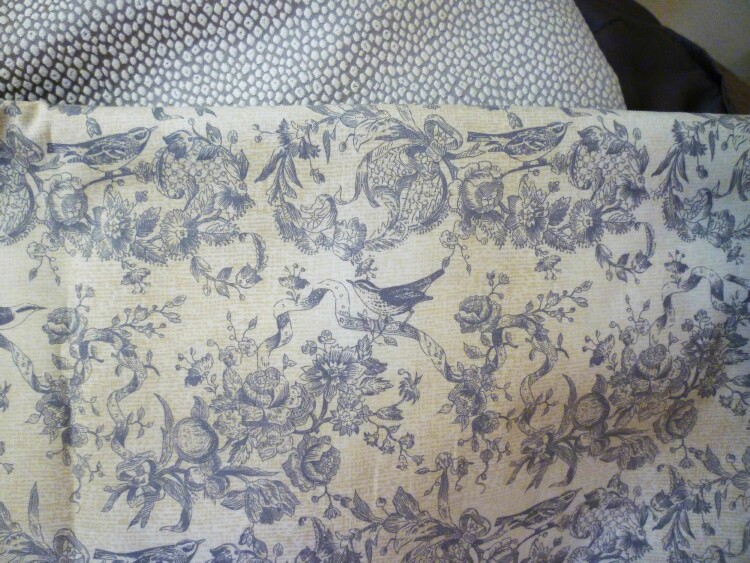
Ta-Da all done. I love it. It turned out great. I am really happy I chose this fabric, it is going to be a good one to work with. The pattern is subtle, but just enough to be interesting.

Now to make a dust ruffle. I found a really pretty gray and cream floral pattern that I think will be pretty for the dust ruffle. Maybe give it some interest with some kind of trim too.
Ok, I need to start sewing when I have 5 minutes to spare.
So what do you think, gray or cream comforter?
If you like Thrifty & Chic on a Budget, I would love to have you follow me.
Have every post delivered to your inbox with Bloglovin
Check out Pinterest & See behind the scenes on Instagram


Subscribe to Blog via Email