I always try to keep an open mind and look at a piece for what it can become instead of what it is. While out shopping for a chest or console to use on the patio, I saw this fabulous headboard. Now I wasn’t looking for a headboard at the time, but when you find something you like at Hotel Liquidators, you better buy it. Some things are limited and it might not be there when you come back. I love to browse through all their stuff since it is usually really heavy duty and the prices are amazing. You just need to have a creative eye since most everything is really outdated unless you are lucky enough to find a piece of furniture that works for you. (Tip – if you need chairs of any kind they usually have hundreds to choose from. They will most likely need to be re-upholstered, but the prices are so low you can afford to do that to get exactly what you want at a reasonable price.)
When I saw this headboard I knew it could be turned into the gem that I need for the Guest Bedroom. This room was full of nothing but left-overs and weird stuff that didn’t have a home anywhere else. It really needed to get it’s own identity and style. I think a Guest Bedroom can be funky or really elegant. I am going for something more on the elegant/grown-up/pulled together look.
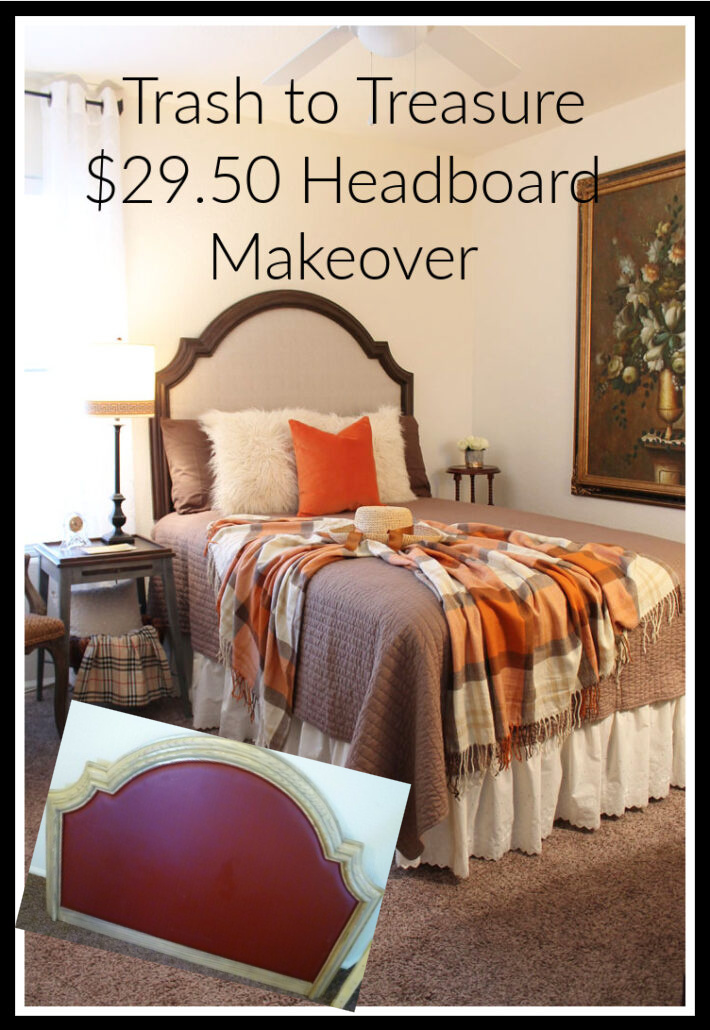
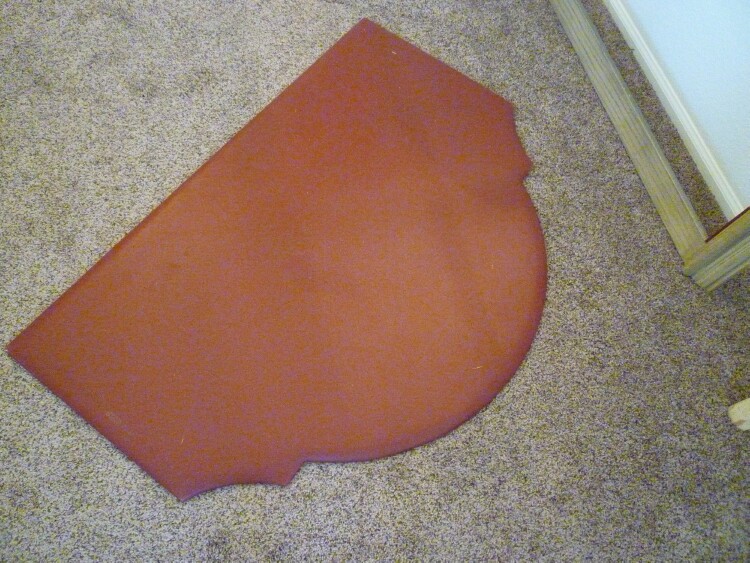
This is the headboard I found for $29.50. Not exactly what I was looking for, but I can refinish the frame and reupholster the insert and it will be perfect. 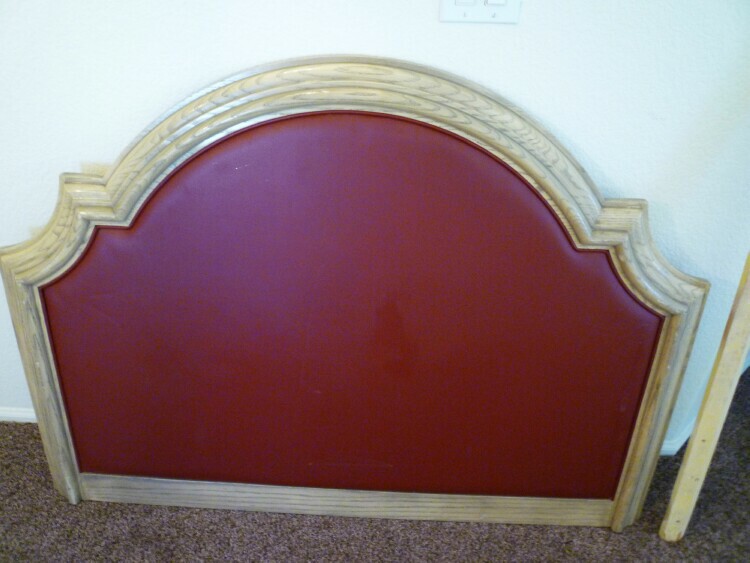
For years I use to be scared to death to try and tackle any kind of upholstery project. Now I still have my limits as to what I will tackle, but most things are really simple. Just take a look at how it was put together as you take it apart and then put it back the same way. This headboard had this particle board back on it that held everything in place and also held the cleat that you used to hang it on the wall. Just held in by screws. So first step is to take all the screws out and see what’s behind it.
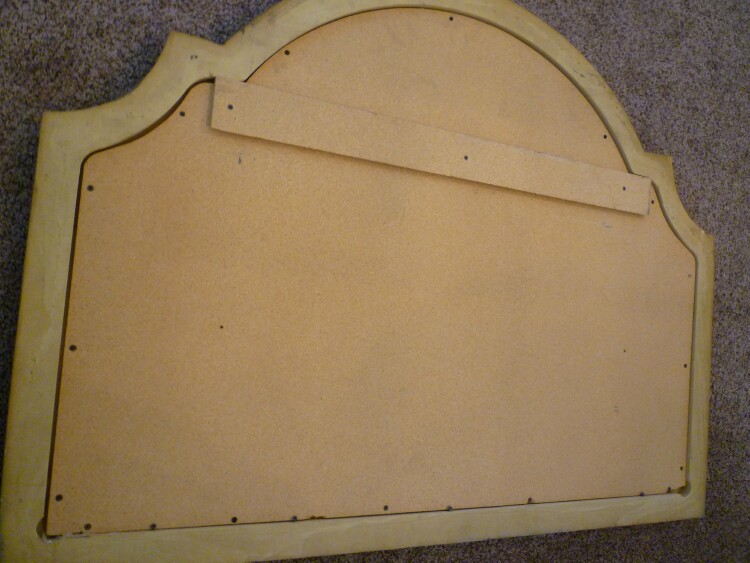
Once the backing was off you could see that the upholstered insert of the headboard was also held in place by little pieces of board that were stapled in. Remove those.
Once those were removed, the padded part slipped right out.
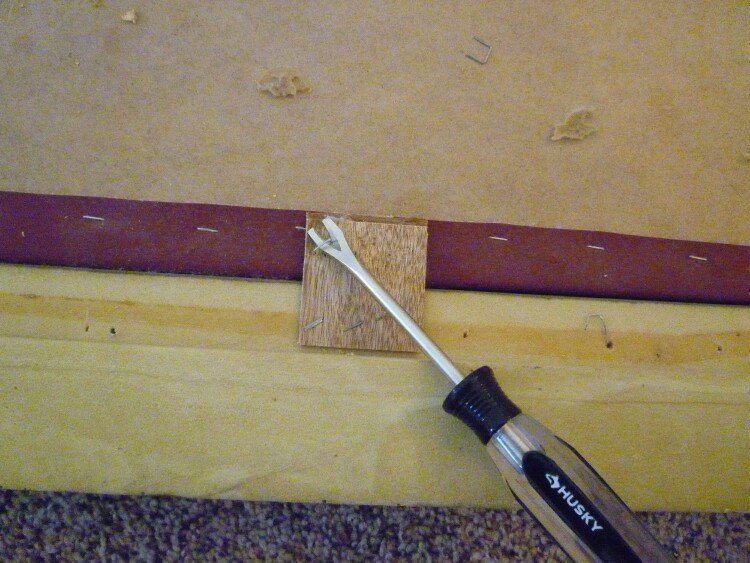
The cording edge was applied directly to the frame with about a gazillion staples.
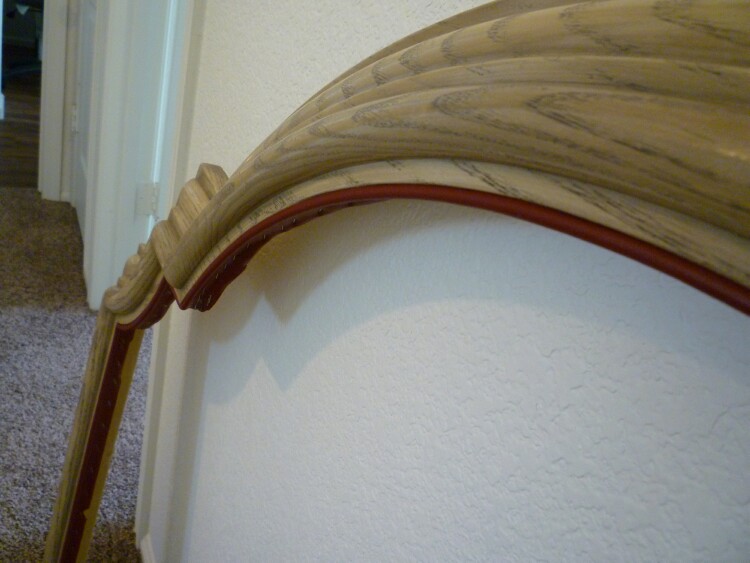
Remove the cording, this was fairly easy and most of them came out by just pulling on the cord.
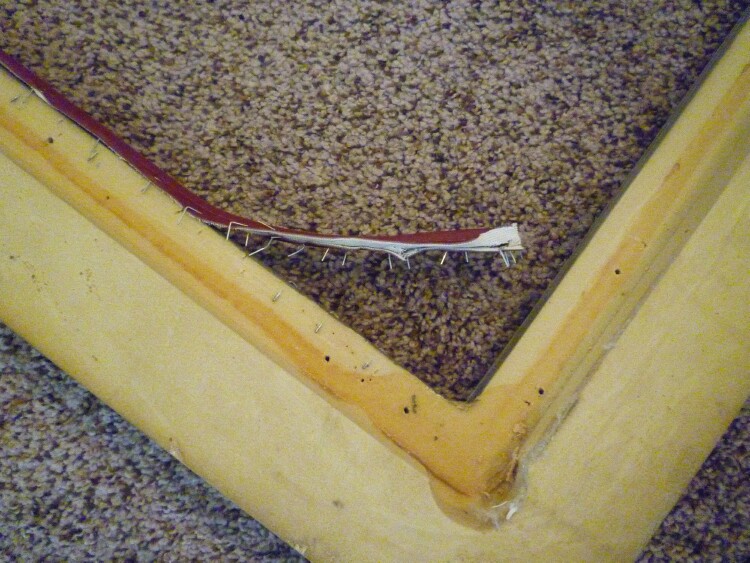
Finally I have an empty frame to work on.
I set up a work station on the patio and got out my fun little bullet sander.
The old finish was a white wash paint finish, so it was really easy to sand off.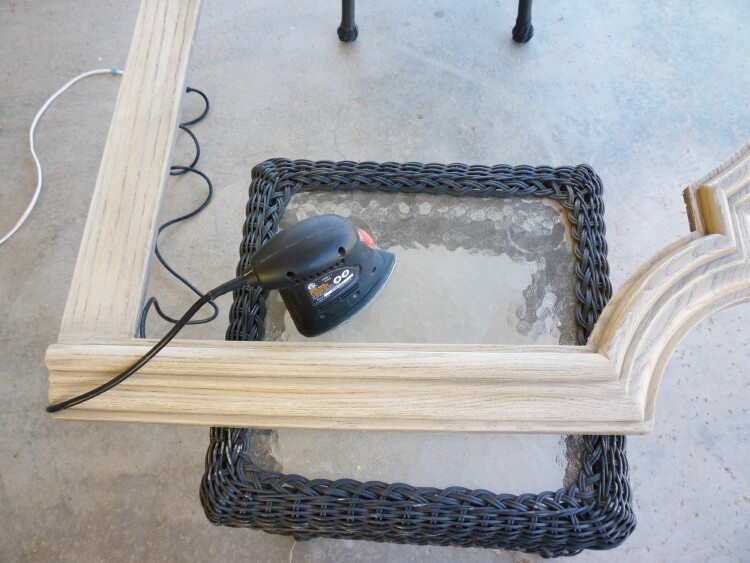
Once everything was sanded, I wiped it down good to remove all the sawdust.
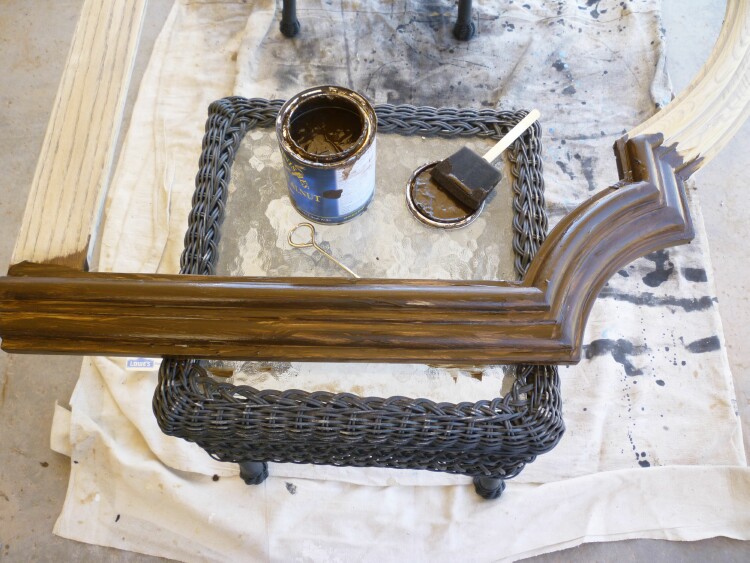
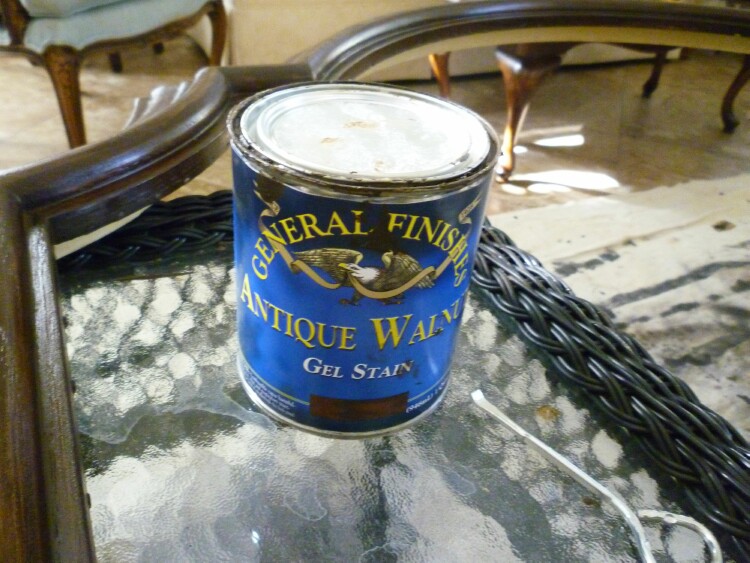
Then got ready with my General Finishes Antique Walnut Gel Stain.
I also got out the rubber gloves and cut up an old tshirt to wipe the stain off with.
When you first paint it on you think you have totally ruined it. Don’t let it sit very long – paint it on and wipe it off right away. If you let it sit too long and it is hard to wipe off, just add more stain and then immediately wipe off.
The first coat always looks a little blotchy, but never fear. A couple of coats and this will be stunning.
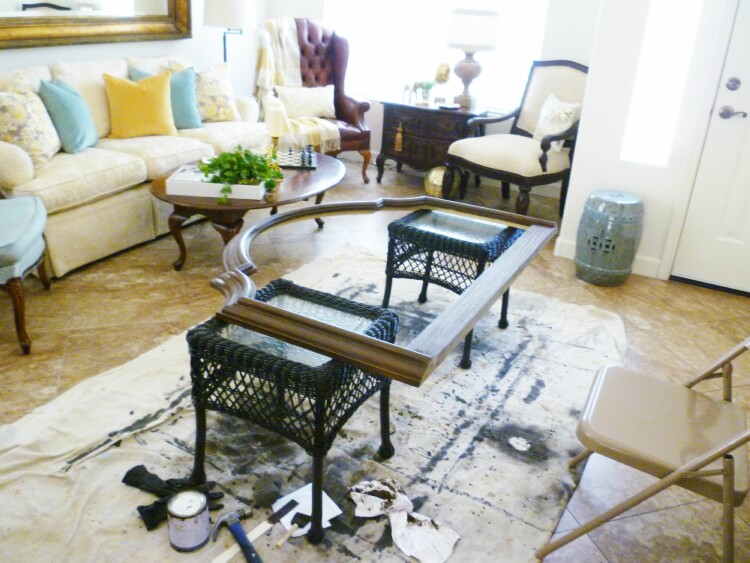
For the second coat of stain I had to set up inside. Doesn’t everyone stain furniture in the middle of their living room? This was the only place that had a big enough area that didn’t impede traffic. I couldn’t work outside, it was over 100 degrees and the pool guys are working on the pool and stirring up tons of dust anyway.
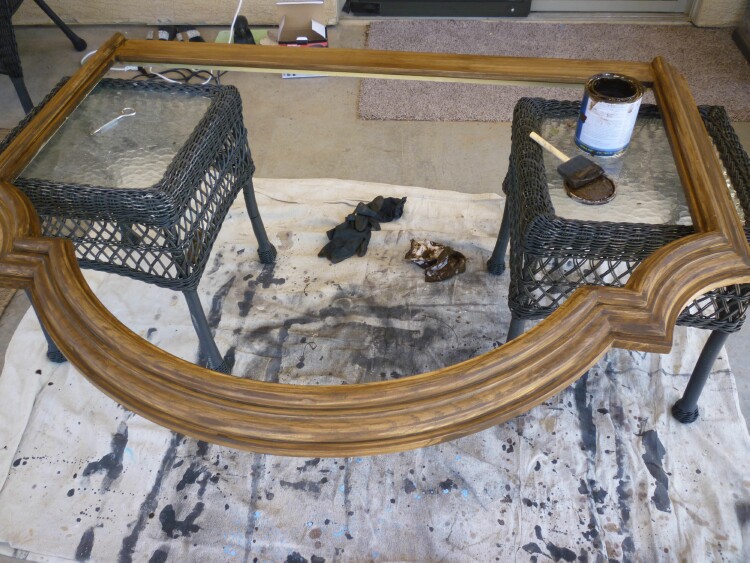
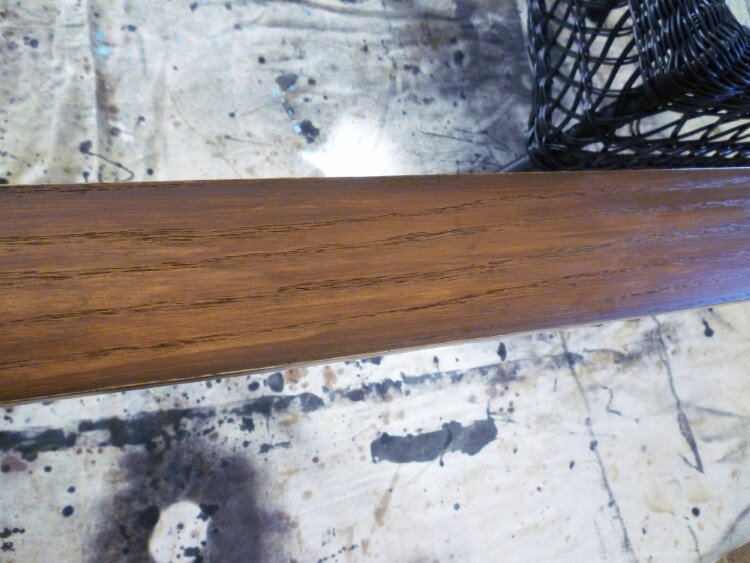
The second coat looks so much better. I think this might be enough, I will have to wait and see if I think we need a third coat. I want it dark, but not too dark, so when this gets the poly on it I think it will be just the pretty walnut color I was looking for. It has to dry for 24 hours and then we will see.
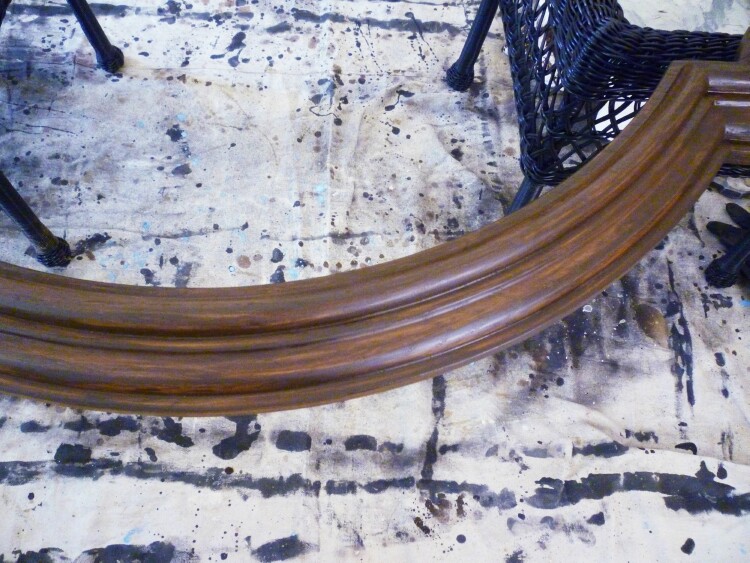
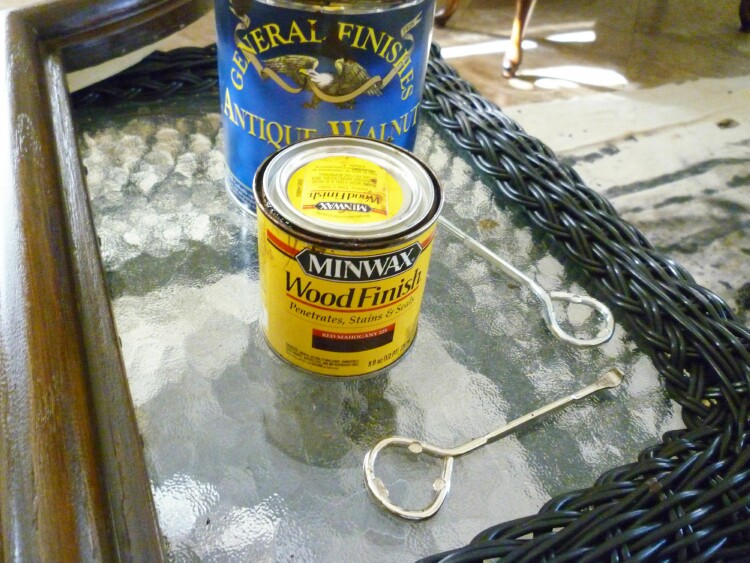
When this was dry, I used fine steel wool to smooth is out, then I applied a coat of Minwax Mahogany stain using a soft cloth and then rubbing all the excess off as soon as I applied it.
This is the Gel stain that I used for the first two coats – – –
this is the minwax mahogany stain that I used on this last coat.
This gives the wood a rich tone that looks more expensive and aged. This also has a sealer in it so the piece has a soft sheen without having to use another top coat. Now to do the padded insert. I still need to find fabric. Got to go shopping.

This doesn’t look like a $29.50 headboard anymore.
Choosing fabric for the guest bedroom is fun and difficult all at the same time. I love our new house, however like any home it has it’s challenges. The previous owners had new carpet installed before they put the house on the market. It is really nice carpet, just not my color choice. Nothing really bad, just a little dark for me. It is a tweed with specks of black/brown/cream in it, and somehow reads a little on the chocolate side that tends to have a bit of red in the right light. I tried a few different fabric samples to see what might work and finally decided on light and bright.
All of these would work with the carpet and are colors that I really like. I decided that since this is such a small room, I would go light and monochromatic.
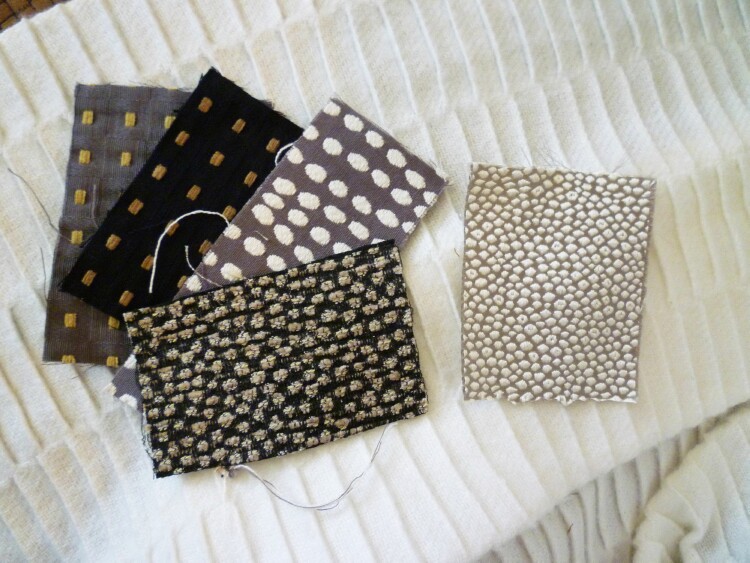
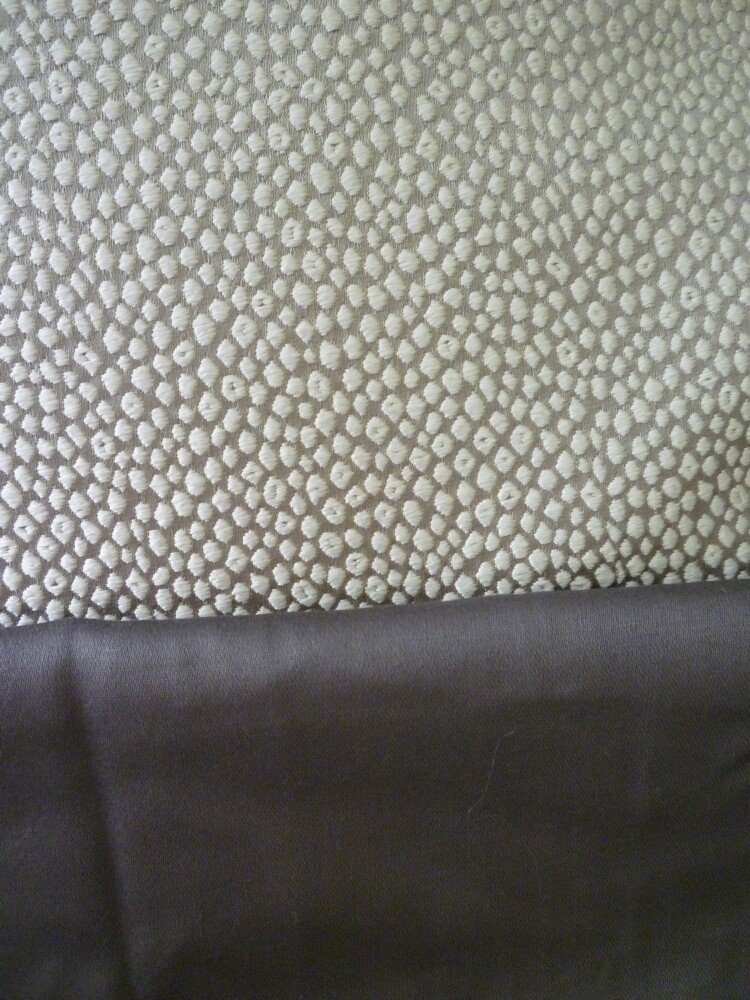
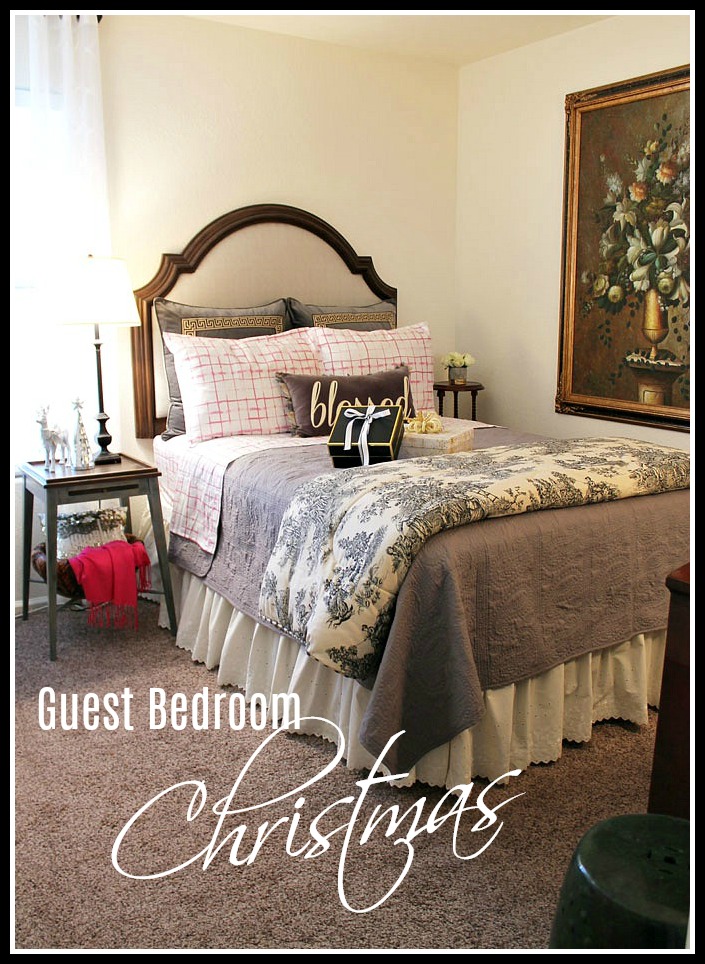
I chose this taupe/gray dotted fabric. It goes well with brown and with gray and that is what I wanted. I can change things up and not be married to one color scheme. I already had some dark gray shams, so that works too.
I was trying to find a place that wouldn’t impede traffic to work on to cover the headboard insert. The middle of the living/dining room seemed my best bet. haha Doesn’t everyone do an upholstery makeover in their living room by the front door?

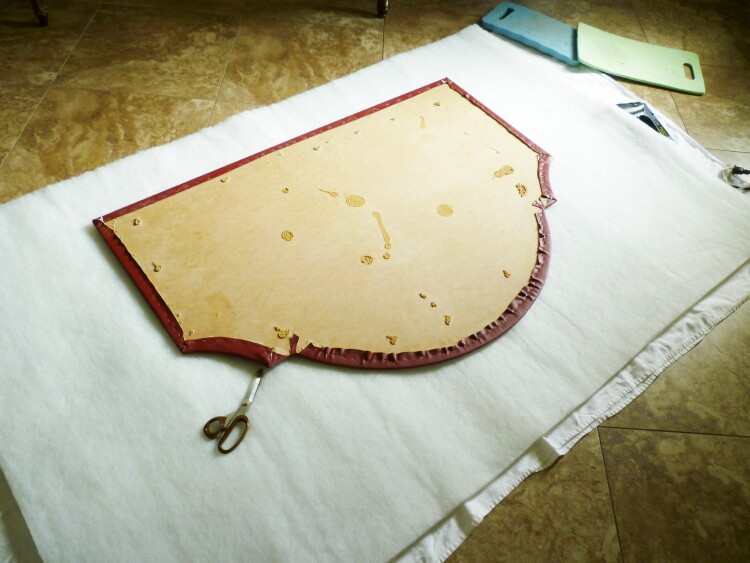
I had everything all layed out. The red leather cover that was on the insert had a small piece of foam attached to it, I didn’t take that cover off, in fact I wanted more padding, so I layed it down on a thick piece of batting and cut around it so I could start stapling it on. However that particle board they used was so hard I couldn’t get a staple to go into it. Not sure what kind of staples they used, but I tried a hand stapler and my electric one and nothing would penetrate that board. I even tried a nail and I couldn’t get it to go in either without bending. So back to the drawing board.
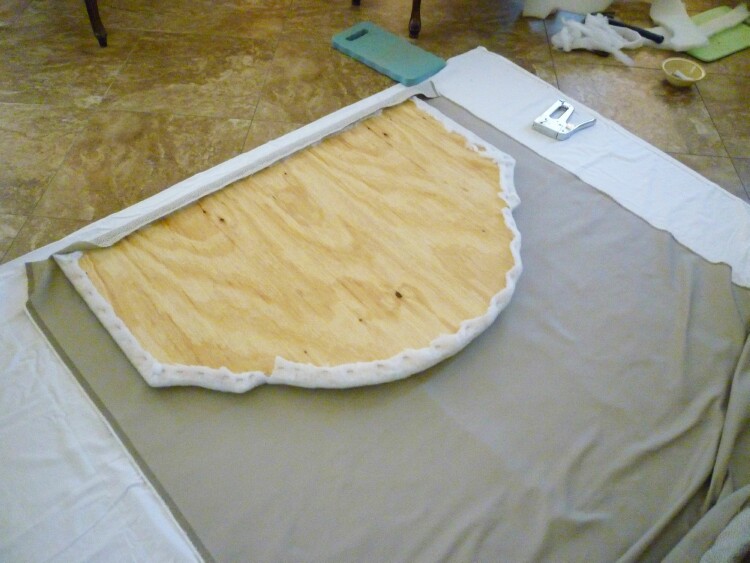
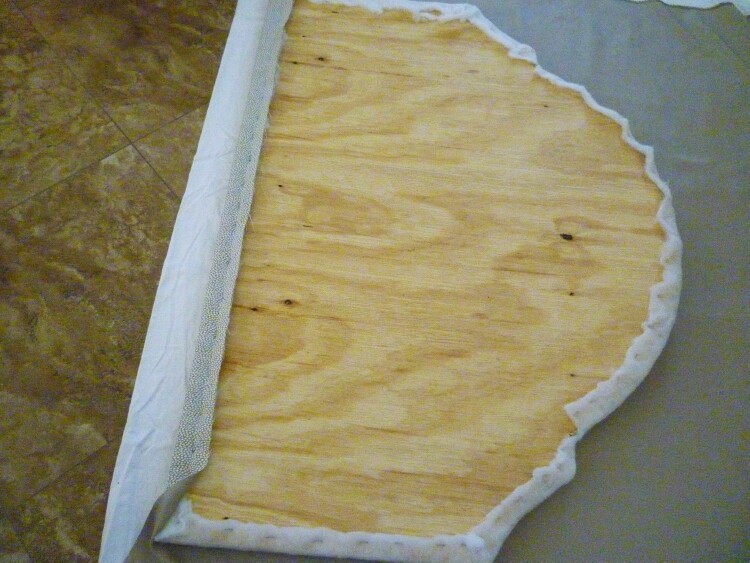
A trip to Lowes and I had a piece of plywood. We traced the outline and cut out the design, then I covered it in two layers of batting. Now to do the fabric.
You guys have all seen a million tutorials on how to pull the fabric tight working from top to bottom and side to side. I didn’t take a bunch of pictures, it’s the same process you have seen, so I just got busy and started stapeling. You can see how the batting is pulled around and stapled, the same thing applies to the fabric. If you really need to see a step by step, you can check out this simple tutorial here.
Ta-Da all done. I love it. It turned out great. I am really happy I chose this fabric, it is going to be a good one to work with. The pattern is subtle, but just enough to be interesting.
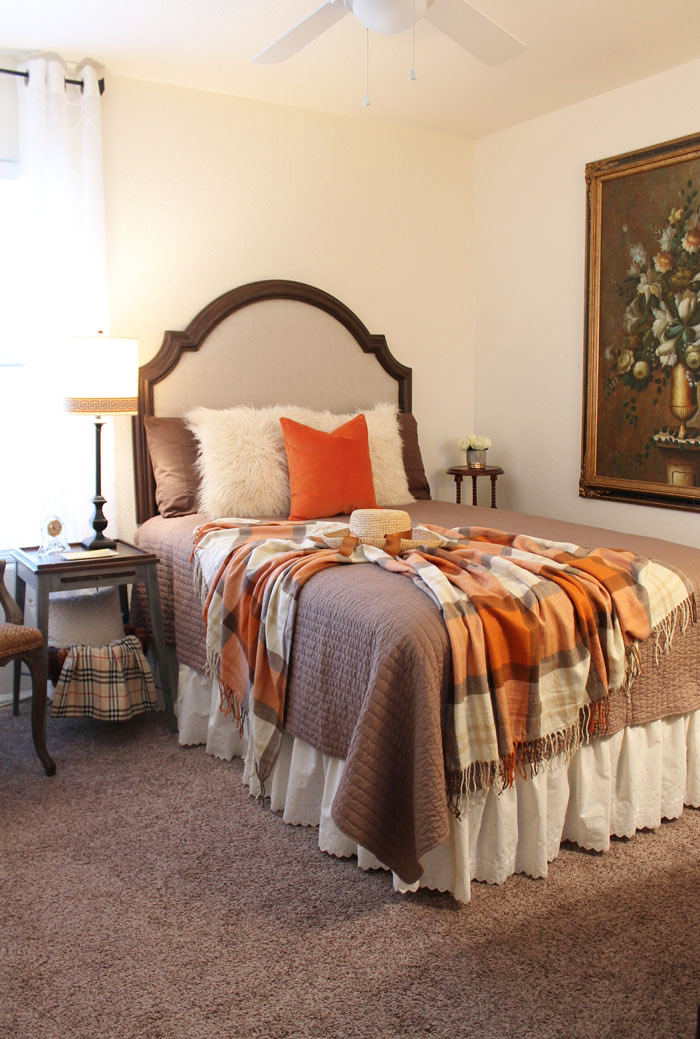
I love that I can use different color schemes throughout the year.
Shop around and find something you can refinish. It isn’t nearly as hard as I once thought it was.

Marty — great look and great tutorial! Thanks.
Beautiful Marty…praying for a good recovery for your Hubby..
Oh I just love this!!!! It amazes me what fabric and paint (or stain) can do to an outdated piece of furniture. I would say this was definitely worth your time. Looks great:)
This is beautiful! I love that it has textured fabric too